Few things are as frustrating as running into error codes, especially when you have no idea what the problem might be.
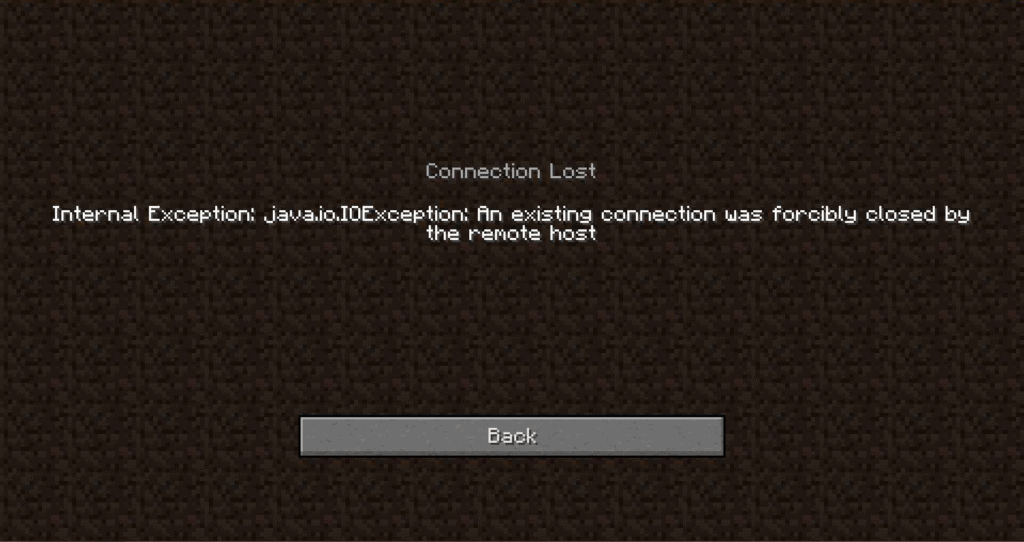
What kind of error is: Internal Exception: java.io.ioexception
Simply put it is an internet connection error. Your computer is trying to establish a connection to the Minecraft server you have chosen and that connection gets interrupted while traveling between the server and your computer.
What is the solution to this error?
Let’s start solving this problem with some basic solutions that work for almost any error. Do not skip these unless you have already tried them, because these are the simplest solutions that take the least amount of time!
- Power cycle your Router, by unplugging it for a minute and then plugging it back in to start again.
- Restart your computer.
- Restart Minecraft.
Those are basic steps that will let us figure out if your problem is temporary, or comes from a larger issue that will need more troubleshooting. If these didn’t help it is time to try some of the more advanced steps.
Advanced Troubleshooting
If the basic steps above didn’t work for you, it’s probably time to look at more advanced solutions.
Uninstall and reinstall a fresh version of Minecraft
One of the biggest culprits with Minecraft issue is … Minecraft itself. Before you do anything too advanced to try and solve this problem, try to uninstall the game and reinstall it fresh. Do not reinstall any texture packs, mods, or Optifine yet. Try connecting to the server with the base game and see if it solves your problem.
Enabling the Java Native Sandbox
The Java Native Sandbox lets you start Java applications such as Minecraft in a restricted environment that might bypass whatever is causing the issue with your connection to the server. You can enable it with the following steps:
- Go to the search bar on the Windows Task Bar, usually at the bottom of your screen, and type in “Control Panel” and click on the entry that pops up.
- Find a section with a header “Programs” and click on that header.
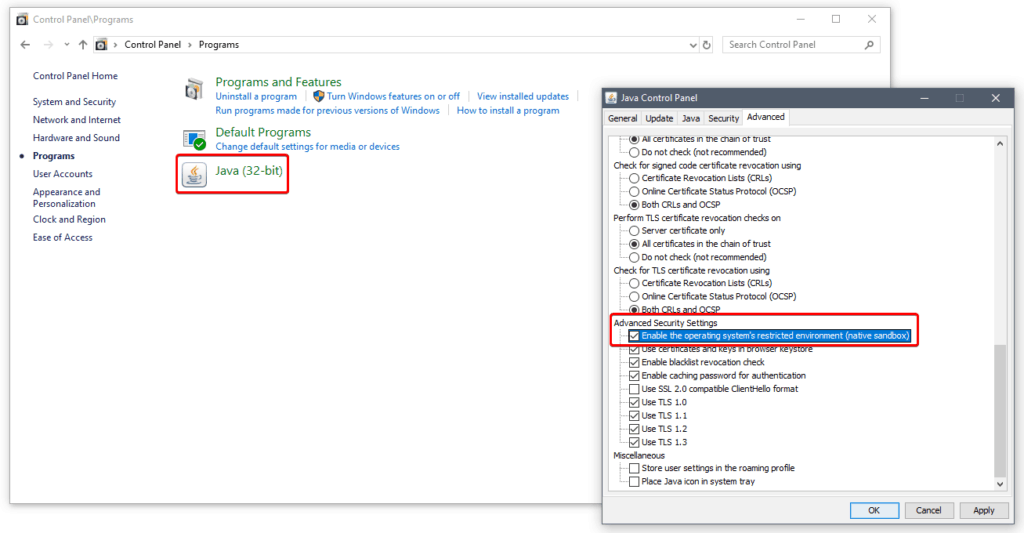
- On the following screen you should see an icon for “Java”. Click on the header. We have marked the Java header and icon in red in the below graphic.
- You should now have a small pop up labeled “Java Control Panel”. In it switch to the “Advanced” tab and start scrolling down until you see a section labeled “Advanced Securrity Settings”. We have marked this section in red in the graphic above.
- Here you will find an option for “Enable the operating system’s restricted environment (native sandbox)”. Make sure it is checkmarked, then click “Apply” and then click “OK”.
- It is very important that you now restart your computer, so that the changes can take effect.
After restarting your computer, start up Minecraft again and see if the connection to the server now holds. If it doesn’t, feel free to disable the native sandbox again for the sake of not adding more parameters to the problem you’re trying to track down.
Changing the DNS on your router to the Google DNS servers
Your internet service provider might have temporary issues with its DNS server, preventing your computer from finding the server you are connecting to. You can find your DNS settings in your router/modem administration panel and it will usually be set automatically.
Almost all routers will allow you to switch DNS servers to the ones you specify manually, usually two of them. You should enter the following values:
- Primary DNS Server: 8.8.8.8
- Secondary DNS Server: 8.8.4.4
The new DNS server settings will connect to Google’s own servers whenever it is trying to connect to something from your computer, and this tends to be a lot more reliable over time than whatever your local internet service provider will give you. Even if this solution doesn’t work, it is probably a good thing for you to keep the new settings.
Conclusion
Hopefully this solution helped you fix the Internal Exception: java.io.ioexception error and let you get back to playing Minecraft. If not then you might want to take to the Minecraft Forum to find some more information.
