Few errors can be as frustrating as the “JNI error has occurred” in Minecraft. Thankfully, there are a few solutions that should help you fix the Minecraft JNI error.
What Kind of Error Is the Minecraft JNI Error?
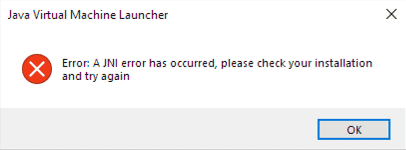
Minecraft JNI Error
The “a JNI error has occurred” in Minecraft is only found in the Java versions of the game. It basically means that the game or the server you’re trying to join has a Java-related issue.
How to Fix the Minecraft JNI Error
Unfortunately, fixing the Minecraft JNI error doesn’t have a simple fix. While you should try restarting the game and restarting your computer, it’ll most likely not resolve the issue as it would with exit code 1 or error code 502.
That said, there are a couple of more advanced solutions that shouldn’t take too much time and will surely fix the Minecraft JNI error.
Install the Latest Java Version
The first thing you should do is install the latest Java version. While you could download the JRE version, it’s better to download the JDK one, especially if you’re running a server or mods.
All you need to do is choose your desired version (I’d suggest you pick the latest one), and download the installer. Then, follow the instructions on the installation tab, and you should be able to play Minecraft again.
Update your Minecraft mods
The JNI error can sometimes be related to your Minecraft mods. So, make sure that each mod is updated, especially if you’re running on a new Minecraft version.
Delete Broken Java System Variables
If none of the above has helped you fix the Minecraft JNI error, you’ll need to check your “System Variables”. There are a few steps that you’ll have to follow for this, though:
- Press the Windows+R key, type “sysdm.cpl” on the Run window, and press Enter.
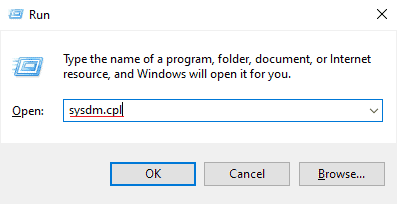
Using the Run command to find the System variables
- Click on the “Advanced” tab and select “Environment Variables”.
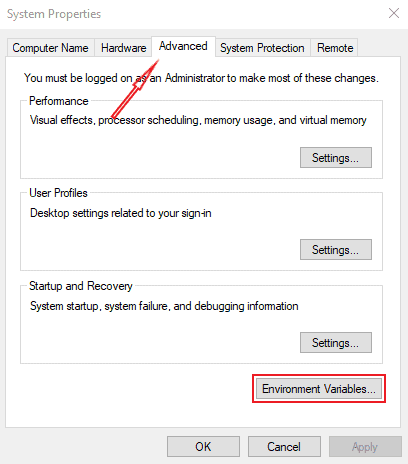
Selecting the Environment Variables
- Find the following on “System variables”:
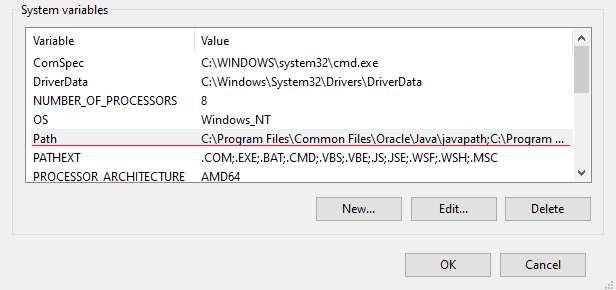
Finding the javapath issue
- Delete the variables that end in ”/javapath”.
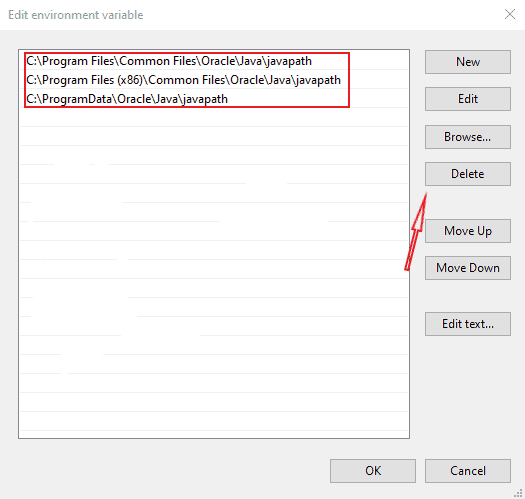
Deleting the javapath variables
- Restart your computer.
After that, the JNI error should be fixed!
Conclusion
Hopefully, this has helped you fix the Minecraft JNI error, and you can hop on your favorite server again. If you need additional help, you can take a look at this thread or check out Minecraft Forum.